Hike

Lake of the Angels

I decided to do a weekday adventure this week by exploring out on the Olympic Peninsula. There’s something about the drive out there that has me trying to avoid it. The good news is it has most of the hiking population of Seattle trying to avoid it too so you’re always guaranteed a nice quiet trail. I chose Lake of the Angels because I had seen photos and thought the mileage wasn’t too bad for a one day trip with the drive.


mileage

7.5 + 2

elevation gain

3,350 ft

location

Olympics

drive time from Seattle

2.5 h

useful gear

Poles for steep slopes

permits/passes

N/A

I left Seattle a bit before 6 and made the drive to the Hood Canal area via Tacoma and Olympia. It always amazes me the level of traffic coming into the city at this time of the morning. With a brief stop for coffee along the way I got to the Putvin trailhead at 8:20. I don’t know what it was but I felt a little off at the beginning of the hike, jumpy at any noise and felt like I was huffing more than I should have been, probably didn’t help that I read a trip report that ran into a family of cougars on this same trail.

After 1.3 miles I came to almost a second trailhead on an old road, which had a sign for the Lake of the Angels (another 2 miles ahead). The trail after this sign is pretty unforgiving it climbs more than 2000ft in 1.7 miles. I worked up quite a sweat on the way up! In some parts it was so steep you had to scramble up roots and rocks which once above you finally break into the alpine (and are rewarded with ripe huckleberries). The trail then passes the Lake of the False Prophet (lol these names) which is really more of a frog filled pond. It is pretty swampy in this section so I was glad I had my hiking boots to navigate through the muddy bog that was the trail.

There was one final climb over a hot and wildflower-covered slope to reach the basin containing the Lake of the Angels. The Lake sits in a rocky cirque under Mount Skokomish. I sat by the lake to rest awhile, watching the fish jump and enjoying all the wildflowers that were in bloom. There’s an obvious lack of mountain goats up there at the moment with their fur everywhere around the basin but none the sight. The Parks Service recently closed the trail for their evacuation in the relocation project.

Lake of the Angels

After having something to eat I was ready to explore the basin, I started hiking and scrambling up rock ridges and ledges towards Mt Skokomish to see how far I could get. I made it up to 5800ft, took a wrong turn off the tracks I had downloaded, going to the wrong saddle before correcting my mistake. From the saddle at 5800ft I could see the traverse under the south face of Mt Skokomish and didn’t like the look of all the loose rock so decided to make this my turn around point.

The hike back down to the lake I took a different route which seemed like it got most of the foot traffic. Back on the Putvin trail, I was glad to have my trekking poles with me. The steep and rock covered trail was easy to slip on the way down. By the time I got down to the old roadbed my knees where pretty sore from the decent. I decided to hike back along the old road which met up with the Putvin trail about half a mile from the trailhead.

Wildflowers:

GPS Track

Hike

Thorp Mountain

This year I decided to foray into leading for the Mountaineers. It’s something I’d been thinking about for a while, giving back to the community that has given me so much. The thing that made the most sense to me was to lead hikes for the organization. After going through the new hike leader seminar I needed to do a mentored lead hike. My friend Ananth was set to be my mentor and he suggested leading Thorp Mountain. I hadn’t done this peak before but I knew he wanted to tick it off his peak-bagging list so I agreed.


mileage

4.4

elevation gain

1,700 ft

location

Teanaways

drive time from Seattle

2 h

useful gear

Boots for Snow

permits/passes

N/A

We decided on the Knox Creek route up Thorp Mountain. It’s the shortest and steepest of the trails to get to the summit. The first challenge was to find the trailhead for this hike. The road it’s on isn’t on google maps (though it was on my Jeep’s GPS), so we directed to French Creek Road and once on the road there were signposts directing to the trailhead. We got 1.5 miles up the road before hitting a bit that is badly eroded. We had my Jeep and a Crosstrek, my Jeep would have been fine but it looked a little close for the Crosstrek so we parked on the side of the road (after turning around to make sure we faced the right way to get out). Which added an extra half mile each way to the hike.

Washed out road

We walked up the washed-out road to get to the trailhead which would be easy to miss, the ‘parking lot’ just looks like a bit of a turn out off the road, there is a weathered sign but it’s up a tree with a very small pink ribbon trying to draw your attention. The switchbacks on the trail are in really great shape, it is a very narrow trail so passing other hikers was a little tricky. Flowers were starting to come out, with different parts of the mountain at different stages, we saw Lilies, trillium, paintbrush, lupine, bluebells and more! It did feel like it was still a little early and another week or so more will be blooming.

There was snow covering the trail just before the junction with the Kachess Ridge Trail, 1315. But this junction was clearly marked with signs. Following the Kachess Ridge Trail north, it was also snow-covered so we checked our map often to make sure we were going the right way. Along the ridge there was a clearing where we got our first view of the mountain and the lookout tower on top. Just before we reached the junction with the Thorp Mountain trail (which was again snow-covered but well signposted) we had to maneuver around a tree that’s bent over the trail.

The switchbacks up to the summit of Thorp Mountain were easy enough to follow with crossing some snow patches required. The views from the switchbacks as you hike up were great, teasing us with what was to come at the summit. The lookout on the summit seems in great condition and the views were 360! We had fun basking on a nice rock in the sun and trying to identify some of the peaks we could see around us.  

After a good amount of time on the summit we made our way back down to the cars, we didn’t have to stop nearly as much as we did on the way up. Overall it took us longer than I thought for the mileage but it’s hard to take into account other peoples fitness levels. I was also pleased with how much more scenic the hike was than I expected but we really lucked out with the weather.

GPS Track

Hike

Mount Pilchuck

An evening scramble I’d signed up for got canceled for today so I decided to head out to Mount Pilchuck. I’ve been to the lookout tower of Mount Pilchuck in 2017 but that day it was pouring rain so I was keen to go back and see if I could get some views. The weather for the day looked pretty good so I was hopeful.

mileage

~ 5.5

elevation gain

2,200 ft

location

Mountain Loop Highway

drive time from Seattle

1.5h

useful gear

Poles, Stiff Boots

permits/passes

NW Forest Pass

I’d forgotten how bad the road is to Mount Pilchuck’s trailhead. I think it might even be getting worse. There are huge potholes in the first mile that make driving pretty slow even in my high clearance Jeep! One mile before the trailhead the road becomes paved as you enter the Forest Service Land which makes for some relief. I arrived at the trailhead around 12:30 surprised by how many cars there were in the parking lot for a Wednesday. As I was getting ready realized I forgot my gaiters. I started hiking hoping I wouldn’t regret leaving them at home.

I didn’t realize earlier but there used to be an old ski field on Mount Pilchuck so the first part of the trail was the old service road. The trail pretty quickly crosses a stream and quickly starts switchbacking up the West side of the mountain. There aren’t any views for the first mile but the trail is really pretty (lots of log steps) and the forest is quiet. The trail becomes even rockier and uneven when you reach some boulder fields and starts traversing up the north face of the mountain. Here is where I met the snow, about 1.25 miles in.

It was well past 1:00 when I hit the snow and it had softened up under the day’s heat. This made it slippery going and the climbing a little more exhausting because of it. Due to the traffic on this trail, it was easy to see which way to go. After the trail traverses for a bit it then opens up to where you can see up to the summit of Mount Pilchuck across a big snowfield. This was a really pretty sight but I could make out people up on the summit and was a little dismayed at how far it looked like I had left.

I reached the lookout tower and summit after about an hour and a half of hiking. The clouds were swirling around the same level as the mountain which looked really cool with the cliffs seeming to go into the sky. I didn’t get the views I was hoping for. The lookout was boarded up, it only gets opened in the summer but it’s balcony made for a nice place to rest and take photos. The lookout tower itself seems to perch precariously on the boulders that make up the cliffs and summit of Mount Pilchuck, making you wonder how it stays there.

After 20 minutes the views got even more socked in so I decided to start making my way down. I was quicker on the way down, able to plunge step down the snow easy enough. I avoided most of the glissade shoots because some had rocks sticking out. I post-holed down to my knee on a few occasions because the snow was getting soft. My boots and feet were completely sopping wet by the time I got off the snow and back to the normal trail. Because of the snow being a little slick I was back to the car quickly in just over an hour.

Gaia map

Toketee Falls Hike

Umpqua Hot Springs and Toketee Falls

The same day that I left Silver Falls State Park and hiked Shellburg Falls I made my way south to visit Umpqua National Forest. The biggest drawcard for me was to get to Umpqua Hot Springs and Toketee Falls. Luckily the trailheads for both are very close together. These are both really popular on Instagram so I was glad to be a bit later in the afternoon on a rainy Monday.

Toketee Falls is a very short hike from a trailhead just of the highway. The falls are similar in appearance to Ambiqua Falls, having the falls surrounded by columnar basalt. The viewpoint for this falls, however, is placed above the pool and falls giving you almost a birds-eye view of it. People jump the fence to scramble down to the falls, this looks both sketchy and stupid as it’s very steep and slippery. I noticed when I was there that the parking lot is flanked by a huge water pipe. The pipe diverts water in this river to a nearby powerplant; meaning the flow over the falls is consistent all year. Round trip to the viewpoint of the falls it’s less than a mile.

Umpqua Hotsprings are just a little further down the road of the same highway turnoff. These hot springs in the summer are only a mile hike from the parking lot. This time of year when there is still snow on the road you have to hike about 4 miles round trip from where the road is closed for the winter season. I hoped that this would also reduce the crowds. The road hike wasn’t particularly interesting and I was pretty disgusted to see all the rubbish left at the closed trailhead. I’m really not sure how people think the rubbish gets removed when it’s closed.

I walked the short trail up to the hot springs and was surprised by how busy it was with the road closed. I did have a pick of a few pools to myself and enjoyed warming myself in the hot water while it rained lightly. The upper pool is definitely the warmest so when the people in it vacated I took the opportunity to nab it and warm up. Unfortunately, I couldn’t stay that long, it was already late in the day and I had a bit of a drive to get out to crater lake that evening. The hike back to the car on the road was pretty boring, definitely needed my headphones to pass the time. The snow also made some sections pretty slippery and slow going.

GPS Track

Hike

Shellburg Falls

On my way south from Silver Falls State Park I stopped in at Shellburg Falls on my way back to the i5. Shellburg Falls is similar to other waterfalls in the area. It’s a single drop falls with a grotto underneath just like many of the ones in Silver Falls State Park. It is in Santiam State Forest but the first mile of the hike is on a service road with private property on either side (watch for cows).


mileage

3

elevation gain

410 ft

location

Central Cascades

drive time from Seattle

N/A

useful gear

Rain Gear

permits/passes

N/A

The rain was threatening for most of the morning as I hiked out to Shellburg Falls. The first mile on the access road was pretty boring but I enjoyed catching sight of a Woodpecker and seeing some of the fruit trees in bloom. Just before reaching the state forest the paddocks end and trees pop up on either side of the road making it feel like you have entered the wilderness. Shortly after passing the sign of the start of the state forest the road crosses over Shellburg Creek and you can view the Lower Shellburg Falls. The view of the lower falls isn’t that great from the vantage you get on the road but I didn’t want to scramble down to try to get a better one.

Just across the bridge, there is singletrack leading to Shellburg Falls. This trail winds up to the falls and goes behind it through the grotto. I had the whole place to myself. I guess as the forecast for the day wasn’t that great and the spot isn’t as big a name as Silver Falls. The falls were very pretty being surrounded by maples and moss adding to the atmosphere of the forest.

I followed the trail beyond the grotto and it switched back up to the top of the falls. From here it continues on to a camp ground. I didn’t want to go any further to the campground so I bushwhacked a little to join a forest road which turned out to be the road I started in on. This way I was able to make the hike a bit of a loop. I hiked back to the car and just as I got out of the forest the rain started so I could enjoy the last mile in the rain.

GPS Track

Resources

Hike

Abiqua Falls

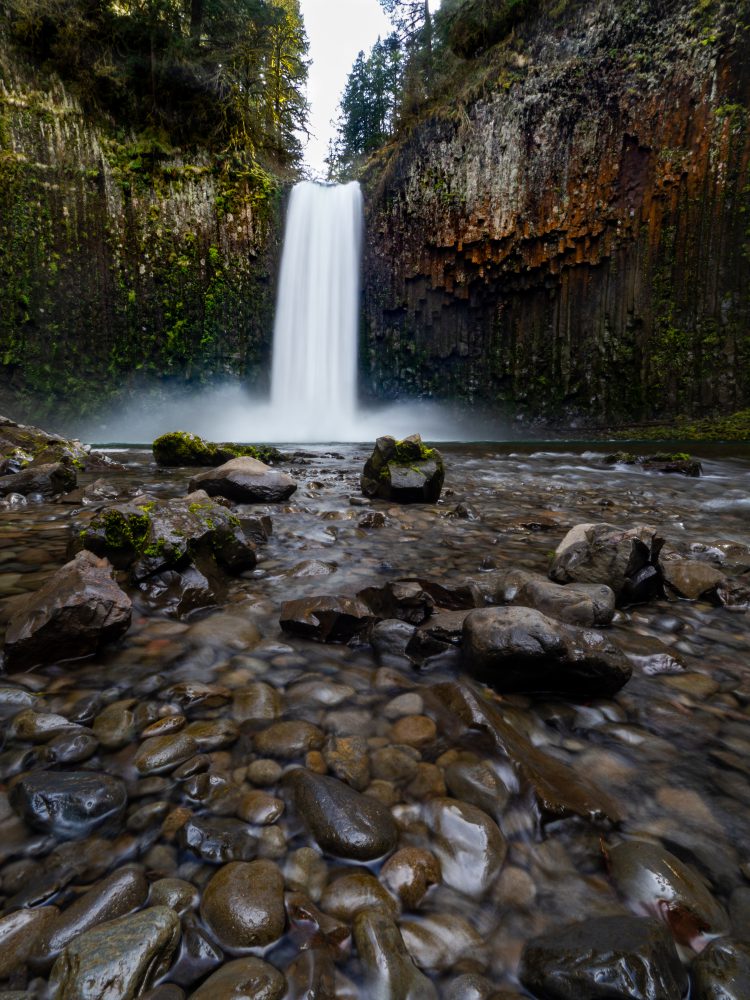
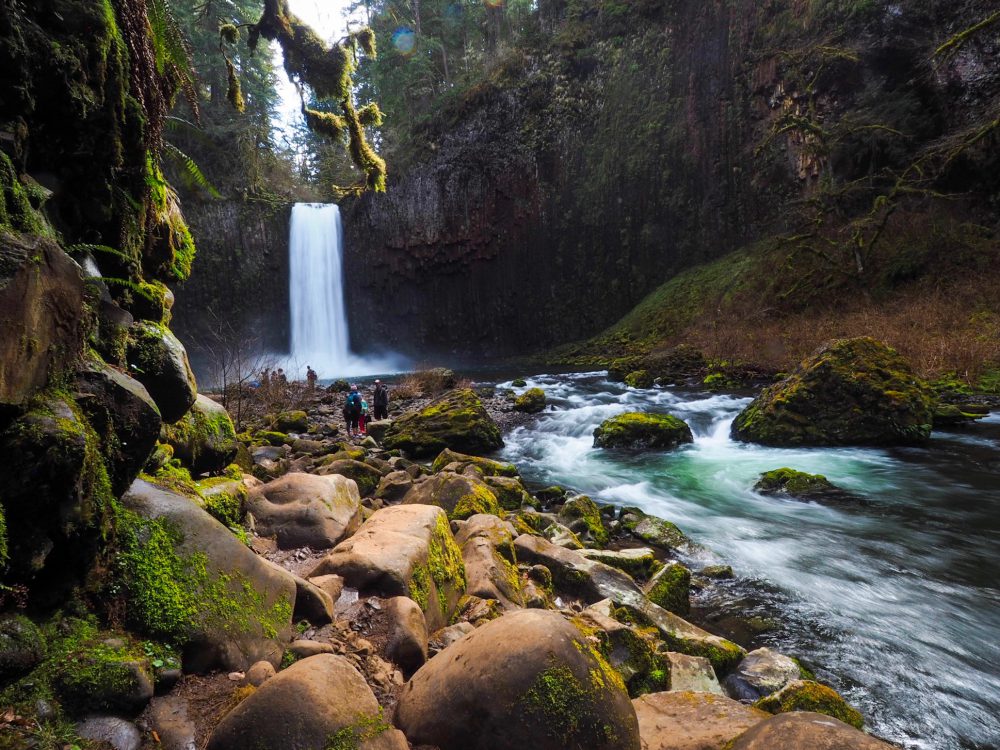
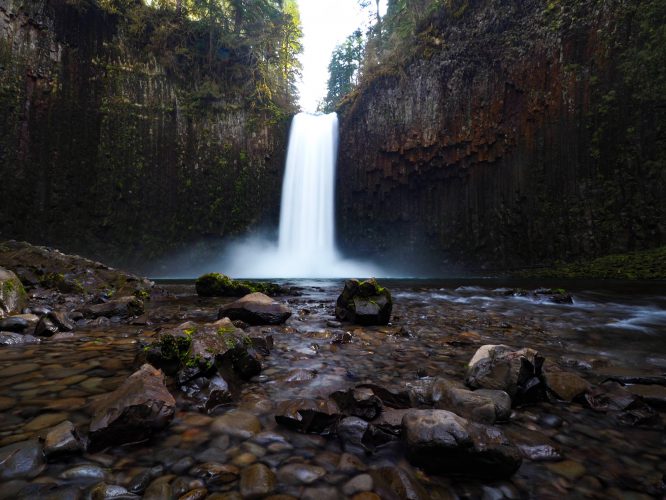
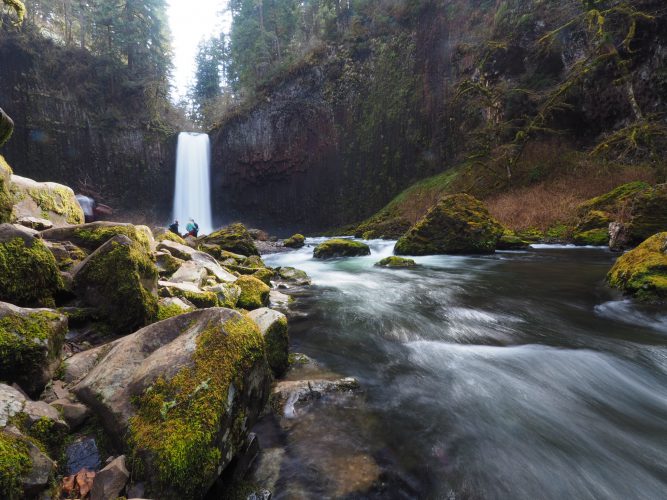
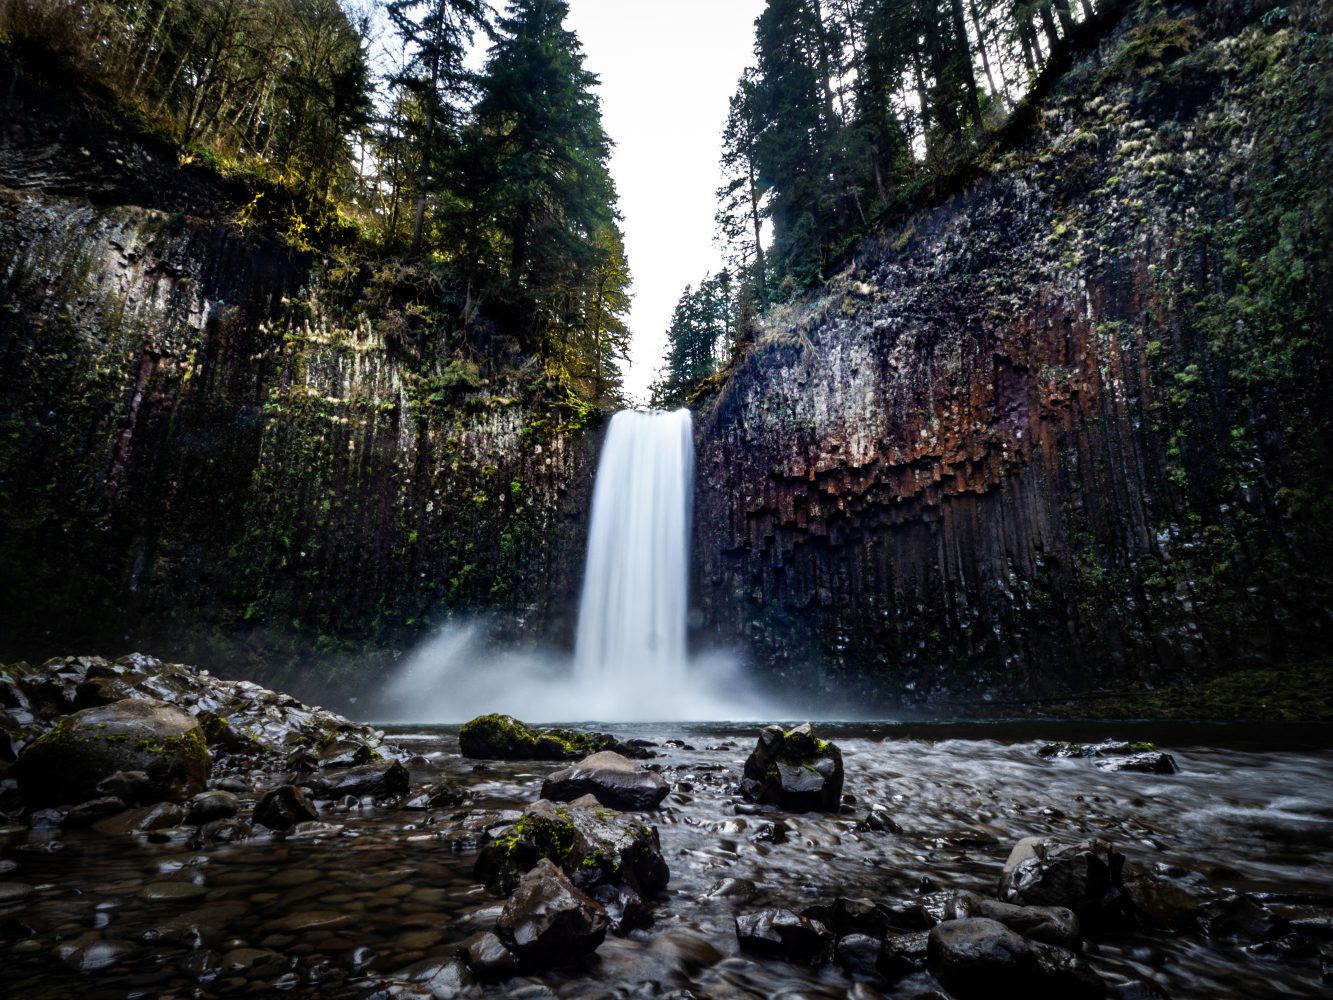
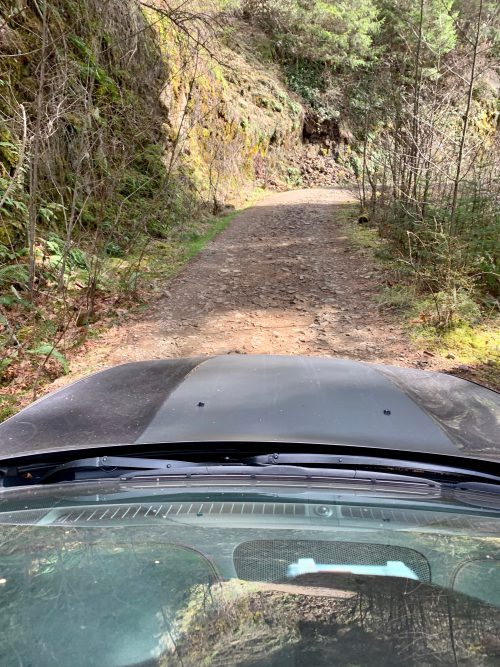
This is a short hike to a beautiful waterfall in Oregon’s Willamette Valley. It’s easy to see why the falls have become instafamous as when you are standing at the base of the falls looking up at the huge basalt amphitheatre.  Getting to the trailhead is just as much an adventure as the trail itself. The trail is on private land so the access road is not in the best shape and 4WD at least getting out is definitely required to drive all the way to the trailhead. People park along the road and walk in if their car isn’t up to the task.

I found google really helpful in directing me to the trailhead because a lot of the forest roads aren’t really marked. The dreaded part of the drive is in the last 2 miles where the dirt road winds steeply downhill and gets riveted and rocky. Some recent rain also left some very large puddles which were hard to figure out how deep they were. It’s easy to drive down slow enough. The trickiest part of the road is a major switchback which is set on a steep turn and over the years has started to wash out. The clearance I have on my jeep really came in handy. At the end of the road is closed and there’s a small area to turn and park along the side. When I arrived there were 5 or 6 cars at the end of the road.

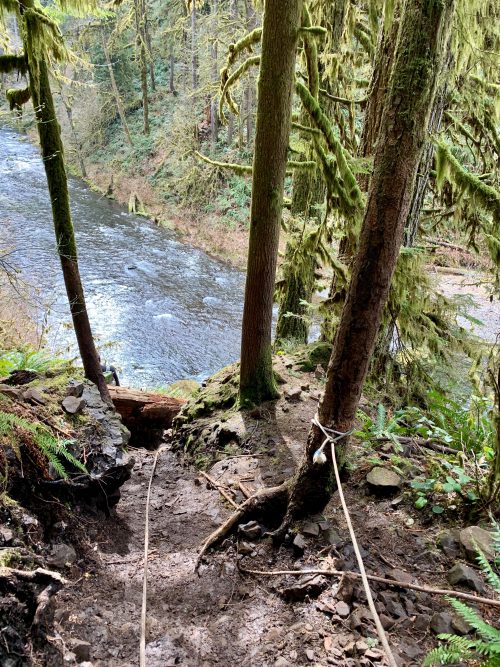
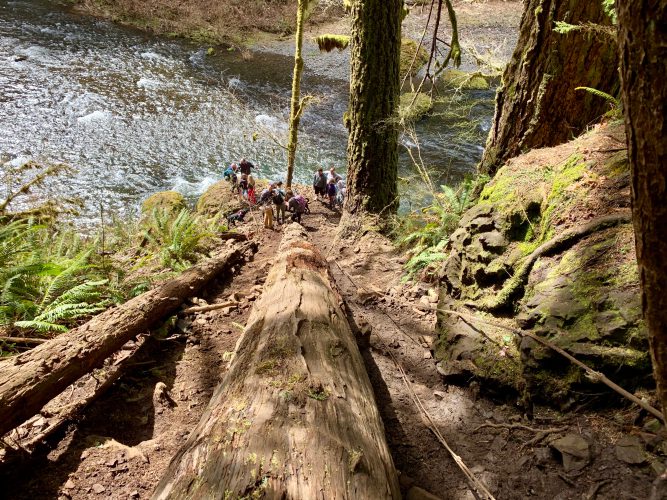
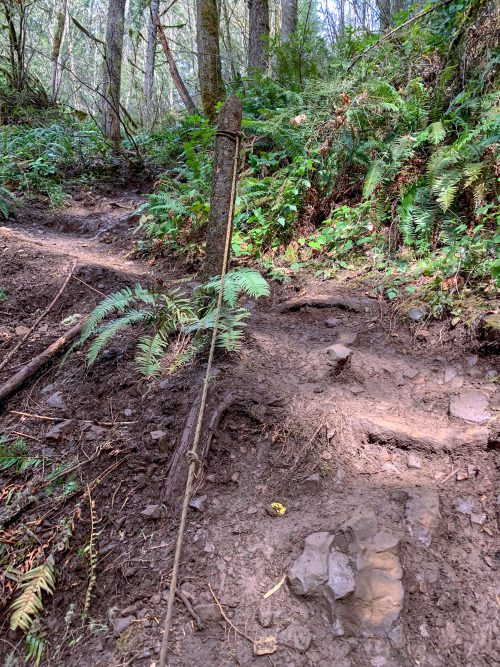
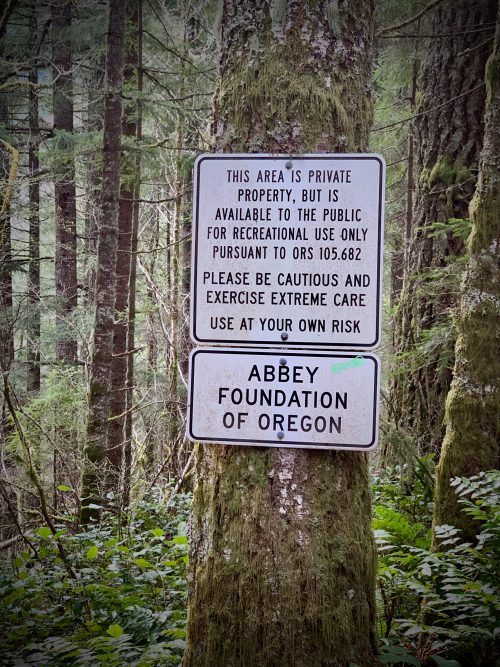
The hike down to the falls starts from the end of the road. There is a big sign saying it’s private property and has been opened to the public but adventuring down to the falls is at your own risk. Make sure you don’t head straight to the river but the trail kind of heads to the left. It winds down sometimes steeply and if there’s been recent rain like there was for me it was pretty slippery so I had to use my hands. The trail turns to the right to head down to the river and runs next to two fallen trees which point down to the river. This part is slippery and people have put up ropes to help you get down.

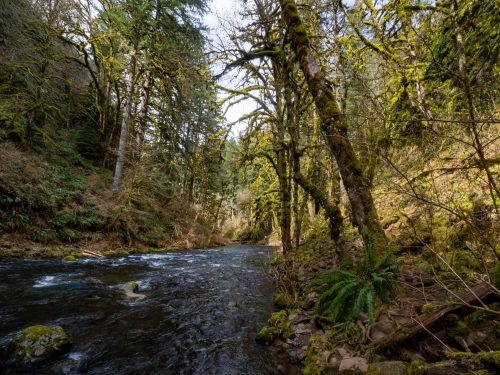
The final part of the trail follows the river bank to the left where you reach the amphitheatre containing Abiqua falls. I spent a bit of time at the falls and even though I was sharing it with a bunch of other people it didn’t ever feel super crowded. The road to get here seems to keep the crowds down.

I took my time with the hike and drive out and was surprised to find a car stuck on the hairpin washed-out turn. It was a two-wheel drive and they had made it down to the falls ok but the car didn’t have the clearance or the muscle power to make it up over the washout. The driver of the car was getting help from someone else and after I checked that they were ok I continued the drive out. I had to put my 4-wheel drive in low to get it up over the washout so I can’t stress enough how a 2 wheel drive shouldn’t be taken on this road.

Trail Info

Further info:

Outdoor Project

Hike

Silver Falls State Park

I was keen to visit the Silver Falls State Park when I took my road trip down to Oregon. I went to the park after my hike at Abiqua Falls (see post) which is really close as the crow flies but due to the roads takes about an hour to drive between. The big drawcard of Silver Falls State Park is the interconnecting system of waterfalls which can be seen in one hike called the Hike of the 10 Falls. I got there late in the afternoon and didn’t have time to do the full hike but got to see all the falls in two separate hikes. I stayed the night at a cabin near the conference centre which was really cute but I wish I had booked one at the park’s campground because they were cheaper. I was excited to visit in April because the falls would be at full capacity from the spring melt.

mileage

8

elevation gain

1,300 ft

location

Silver Falls State Park OR

drive time from Seattle

4h

useful gear

raingear for waterfall spray

permits/passes

Park entry ($3 from Visitors center or parking lot)

There are many options on where to start the trail of the 10 falls, I started my hike by parking at the South Falls Lodge passing the cafeteria and heading to the South Falls to begin. Even though it was pretty late in the afternoon I was surprised how many people there were around. The South Falls is a huge 54m (177ft) waterfall over basalt columns and the trail wraps down into the canyon and behind the falls. The interesting geology of the area means many of the falls have caverns behind the waterfall carved out by the water spray and made wider by the trail makers. The south falls is has the longest drop of any of the falls in the park and this time of year there was a lot of spray coming off. I got a little wet as I went under the falls and stopped to take photos. After the loop behind the falls, there is an option to head back towards the lodge on a bridge over the river or continuing on the canyon trail that follows the course of the river.

I continued on the trail following the course of the river. The trail was mostly flat and I passed several other parties returning to South Falls as it was getting pretty late in the day. After about a mile I got to some switchbacks and stairs leading down to the Lower South Falls. I think of all the falls this was one of my favourites, the path wound behind it, it wasn’t nearly as crowded as the main falls and at this time of year and there was a huge amount of water going over it.

The Canyon trail continues beyond the Lower South falls to where Silver Creek forks to the North and South. The trail now starts following the North Fork. After a short time, I got to the Lower North Falls and the side trail to Double Falls. Lower North Falls wasn’t that exciting – just a small cascade, but I liked Double Falls. Double Falls is the tallest in the park and in summer isn’t much to look at. It’s a thin falls but this time of year was full. The sun was getting pretty low and I was realizing I might not have enough time left to do the full loop. I continued hiking along the Canyon trail passing Drake Falls, Middle North Falls to Twin Falls. Of all these Falls Middle North Falls was my favourite, it was another that you could walk behind.

After a brief stop at Twin Falls, instead of finishing the canyon falls loop I backtracked and hike back to the car and at the South Falls parking lot via the Winter Falls trail. Winter Falls was another thin tall waterfall that in any other season probably wouldn’t be worth seeing. The trail has to climb out of the valley past Winter Falls where it joins the Rim Trail. The Rim Trail is only a way to connect the North and South Falls and not very exciting. It follows the road for the majority of the way.

Winter Falls

Once back at the car with the last of the light, I drove to the North Falls. North Falls was pretty impressive with a huge grotto carved out behind it. I climbed down the switchbacks and steps to explore the grotto and photograph the falls. When I got back to the car the sun had set and I didn’t have time for the final of the waterfalls on the trail (Upper North Falls). Since I was staying at the park I visited the Upper North Falls the next morning. It was a pretty waterfall but the flow was so high it was mostly shrouded in mist and hard to get photos of without getting my lens wet.

Useful links

GPS Track

Hike

Blanca Lake

The cold weather had set in this week but the forecast for the weekend looked clear. There was new snow in the mountains and I wanted to take advantage of it to visit a really popular where the conditions might deter the normal crowds. Blanca Lake is an absolute PNW classic and it’s really easy to see why. The glacial feed lake has beautiful turquoise colors reminiscent of Lake Louise in Banff but unlike the Canadian counterpart, it’s a bit more of a challenge to get to.

mileage

11

elevation gain

3,300 ft

location

Wild Sky Wilderness

drive time from Seattle

2 hr

useful gear

Poles, microspikes

permits/passes

NW Forest Pass

With the days being so short this time of year I left Seattle not long after 6 am to drive to the trailhead. Highway 2 was a beautiful drive, watching the sunrise on the freshly snowy peaks. The road to this trailhead is washed out so it adds an extra 2 miles to the hike each way. Parking is along the side of the forest road next to the road closure sign. It appears the forest service isn’t planning on fixing the washed-out areas anytime soon and have put up a trail information sign behind the road closure.

The 2 miles along the road were pretty unexciting. Luckily it doesn’t have too much elevation gain and its only at the very end that you reach the washout areas. When the regular trail begins it starts climbing pretty much straight away. I enjoyed seeing the light making beams through the thick forest as the low clouds from the morning begun to lift. The trail gains about 3000 ft in 3 miles and I started hitting snow on the trail at about the 2-mile mark. I’m not sure what it was, whether it was carrying the additional weight of snowshoes or not used to the cool air but I felt pretty awful on the ascent and took it a bit slower than I normally would.

The 3-mile point of the trail starts heading up a ridgeline. Here there was a lot more snow and I put on my snowshoes to avoid slipping. As I was out early the snow hadn’t been packed down properly yet so it was harder going than I was expecting. After a short descent, I passed the frozen Virgin Lake, which would be better named as a pond. From here you drop 600 ft to the cirque that contains Blanca Lake.

I couldn’t be happier when I reached the lake, the turquoise waters were beautiful and the peaks surrounding were dusted with snow. I was able to eat lunch sitting on a log on the lake shore and take photos from the top of a snow-covered rock pile. With the amount of snow covering the ground, it was difficult to do any exploring so I didn’t hang around too long. I also got pretty cold because the side of the lake the trail reaches was shaded.

The hike back to the car was completely uneventful, I didn’t need to put my snowshoes on for the way back as more people had compacted the trail. The way back also reminded me how dull the trail is. Apart from a view of Glacier peak along the ridge near Virgin lake its just a steep trail through a thick forest which brings you back to the 2-mile road walk back to the car. Despite the boring trail the views of the lake were definitely worth it. Looking back at the photos it really is hard to believe it is Washington and not Canada!

Hike

Hood River – Mitchell Point

Some friends of Boyd were running in the Columbia River Gorge Marathon this weekend so we decided to make a weekend of it and join them in an Airbnb in Hood River. I obviously agreed to make the trip down for the weekend with the hope of doing a hike in the area.


We lucked out with the weather for this weekend, it was sunny and warm, completely unknown for this time of year. On Sunday morning we had breakfast in Hood River then headed to do a short hike I’d looked up that was nearby. Without much planning and not really knowing what would be accessible after the fires that ran through the gorge last year I chose Mitchell Point. I had wanted to drive to Mount Hood but it seemed out of the question when I realized we all had to drive back together.

Mitchell Point

mileage

2.6

elevation gain

1,270 ft

location

Columbia River Gorge, OR

drive time from Seattle

4 hr

useful gear

Good footwear

permits/passes

NW Forest Pass

Mitchell point is a very short hike that would lead to a big view over the gorge. The mileage was short but the elevation gain was high. The trail was steep the whole way. There were sections that were really rocky too and Boyd wished he had his hiking shoes for. There are lots of cuts off the trail too so keep your eyes peeled to make sure you’re heading up the right one and avoid cutting the switchbacks.

The trail zigzags until it reaches the ridge behind Mitchell Point where it passes under the powerlines. It’s weird huffing up through the forest and coming out to a clearing with such evidence of humans. The final part of the trail is pretty exposed, hiking up the ridge to reach the high point. There isn’t much room on the top so hopefully, you can get it all to yourself as we did. You get a good view across the gorge either side. It was a little hazy but when you normally expect grey and showers for this time of year you really can’t complain!


Further info on trail

Hike

Carne Mountain

I decided to make use of a great weather forecast and get a summit and see some Larches in the process. I went through my list of larch hikes and decided Carne mountain would be a great option. I hadn’t been before because I’d always been a little turned off the road to get there which by all reports the last few miles are some of the worst around. Thankfully with our new Jeep which has high clearance, we made the trailhead with no issues. The road is as bad as everyone says, places where there are huge rocks embedded in and washed out areas that look like they would be very scary in the wet. The parking lot isn’t very big so most people park along the road.

mileage

7 mi

elevation gain

3767 ft

location

Central Cascades

drive time from Seattle

2.5 hr

useful gear

N/A

permits/passes

NW Forest Pass

I arrived at the trailhead around 9 and was really surprised at how many cars there were already. I knew this was a popular trailhead for overnights into Spider Meadows and it was prime larch season so I hoped I would have some solitude on the trail. The trail to Carne mountain branches off the Spider Meadows trail after the first quatre of a mile. The mountain trail heads straight up through the forest with some helpful switchbacks. After about 2 miles the trail clears out as it traverses a rock field and you get views into the valley below. It was still pretty early and this part of the trail was shaded and cold when I stopped hiking.

My first sign of larches was after another mile when I entered a high basin with larches galore and a small creek. From the bottom of the basin, you can stand in the grassy clearing and look up to the summit of Carne Mountain. The ground in the basin was crunchy and frozen as I walked through but as I climbed up from here I got into the sun and it was beautiful!


After climbing through the small basin and up to the saddle the trail splits off to the Old Glib Trail to the right and I went on the Carne Mountain on the left. The trail enters a really thick group of larches here and it feels like you are in a larch tunnel. Along the ridge, the main trail starts heading down into the valley below but for Carne mountain I stayed on the ridge following the path another 0.3 miles.

The view from the summit was definitely impressive. It was a small summit and I had to share it with two other hikers. You get a really good view of Mount Maude in the Entiat Mountains when you look North, to the west Buck Mountain looms as one of the snowiest peaks of the bunch. I spent plenty of time on the summit taking photos and enjoying the view.


I didn’t have extra time to explore the area before heading back down to the car as I had something on in Seattle that evening. I would have liked to have explored the ridge that Carne Mountain is on. On my way back down from the summit, there were now several groups of people in the basin and dogs galore. I was glad I went a little earlier to mostly miss this rush.